The art form of cake decorating can be intimidating to a novice. But even masters had to start with a humbling first cake. Learn in this post the basic tools needed and how to prepare your canvas for your creations.
Let’s eat a fancy decorated cake for my 9th blog anniversary! No, not one cake, let’s have two cakes! Here is a blog veteran tip: keep challenging yourself, make those hard recipes, try those scary cooking techniques. Today I will attempt to conquer one more personal kitchen nemesis: cake decorating.
For my first few blogiversaries, I was always so thrilled and excited. Now I am thrilled and dumbfounded. How did 9 years go by since I started blogging? How come I have survived blogging and still keep doing it with a smile? I am far from the ‘oldest blogs on the net’ but when I started, blogs regularly vanished after a couple of years. Now blogger veterans are everywhere. And OMG next year it will be a DECADE!
A heartfelt thank you to my family, friends, coworkers, and all my online friends/fellow bloggers for reading my posts, eating my food, helping to prepare recipes with me, and leaving your comments that I so cherish. I could never express enough my gratitude for each time you take a moment to visit me here.
This year has been huge. Here is a quote from my 8th-anniversary post: “And just so I have it inked here, I do plan on revamping the site in the coming months! Hold me to my word and make me accountable lol.” Well, a year ago I was Cheap Ethnic Eatz. I did rebrand this year to CulturEatz. I still have things to check off my to-do list (like a new theme and prepare a step by step rebranding sheet) but I have learned so much and I faced the rebranding beast head on. I want to single out one person and thank them for that extra push: thank you Kia, you are a beautiful and fabulous person who inspires me greatly.
I have also returned more to my roots since the new year and I have concentrated once again on really exploring unusual ingredients, digging up lesser-known recipes from around the world, and facing a few kitchen techniques that have always eluded me in the past. Here are some of my achievements so far in the last year…
- Exploring Labrador Tea with Evelyne’s Unusuals
- Getting back into yeast-based bread
- Checking Chicken Bastilla of my bucket list with 2 fellow Montreal bloggers
- Making a successful puff pastry with a Kouign Amann recipe
A crumb frosting makes the cake’s sides straight to later get a perfect corner for you star icing.
My blogiversary post is actually a Part 2 of a cake decorating series. We are going to put that gorgeous Swiss Meringue Buttercream I prepared recently to good use. Cake decorating is one of my Achilles tendons in the kitchen but I am going to give it my best shot. It is an anniversary, after all, we need to have a cake!
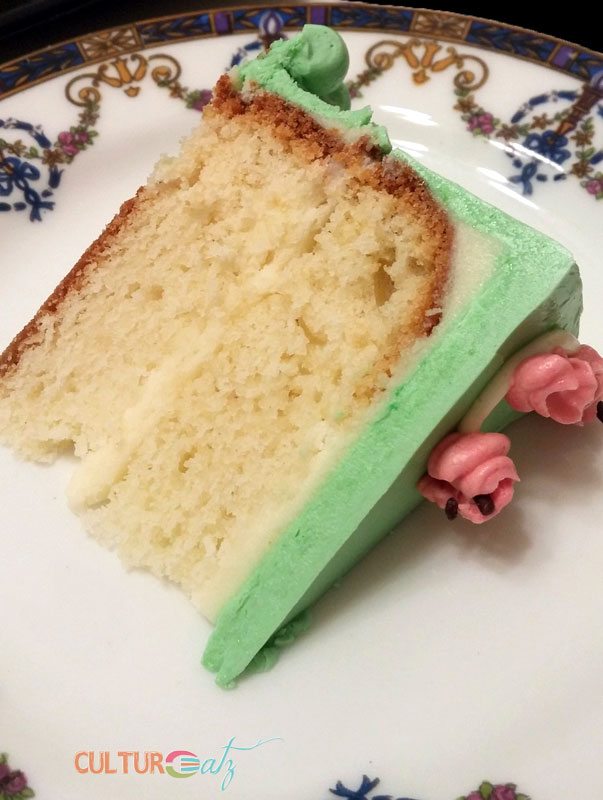
Well two cakes actually: my mom’s birthday cake and our Easter cake. We are just 3 in the family so a 6-inch cake is a perfect size. This cake is on the dense side, the way we like it. Also on the menu for this post is icing tools and tips (metal tips not advice haha), how to fill an icing bag, and how to crumb frost a cake. I am in no position to teach you specific icing techniques, for that I recommend the book I used: the step-by-step Sensational Buttercream Decorating book by Carey Madden.
Click here to buy the Sensational Buttercream Decorating cookbook.
Cake decorating for beginners: cake decorating tools
If you want to go all out you could look at investing a lot of money into setting yourself up for some serious cake decorating. But better to start small. Here is the bare minimum you will need:
- icing piping bag to put your frosting in and pipe. Start with plastic disposable bags and then you can invest in a coated cloth bag.
- metal icing tips for your designs. These will help you create specific shapes. The bare minimum I would say is a small round tip #3, a medium round tip #8, a star tip #32, a petal tip #61, U tip #81, rose tip #104, and a leaf tip #352
- a coupler is a small but essential investment. Slip in into the bag like if it was a tip, on the outside place the tip you want and screw it in place with the other coupler piece. You can switch tips for the same icing.
- A cake board to place your cake on when you are working. I am also using it as a cake turntable until I decide to buy one.
- a straight blade spatula
- food coloring gel to color your icing
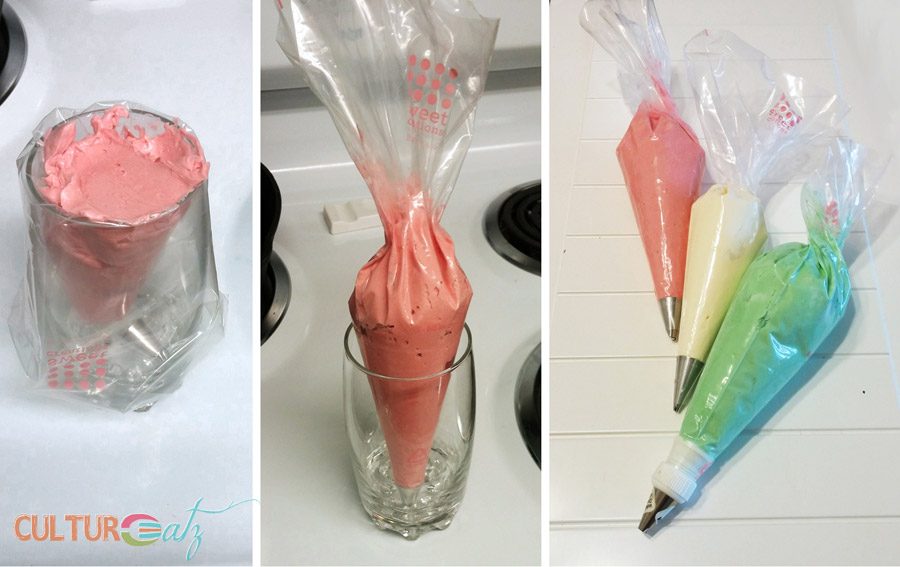
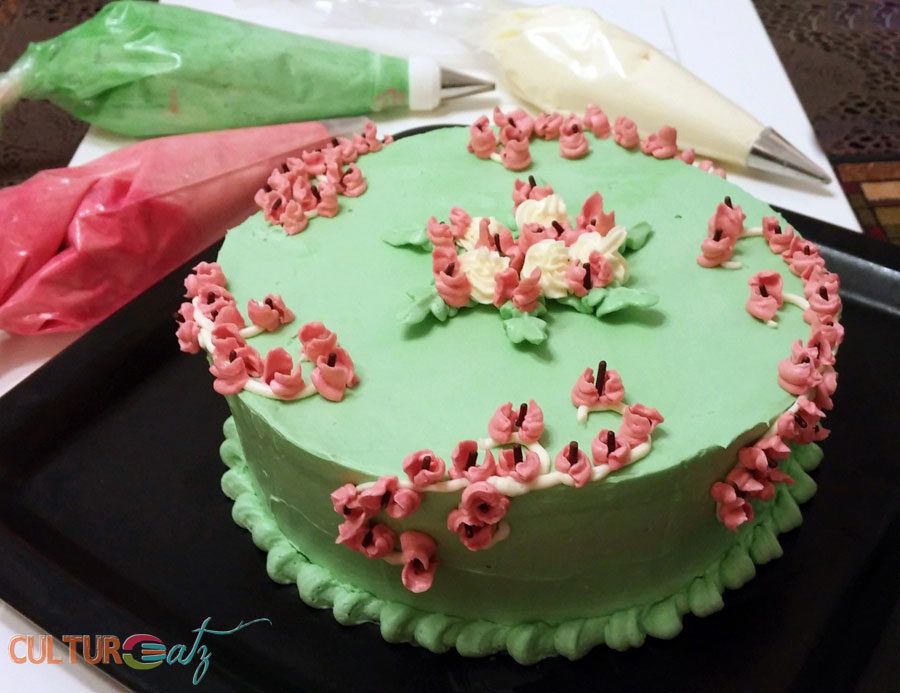
Filling your Pastry bag
Place tip or coupler on the bag. Now put the bag in a highball glass, flip the bag over the sides of the glass and fill it with icing – the right color for the tip, I learned that the hard way. Fill it only about 1/3 to 1/2 up and avoid air bubbles. Now twist off the end so the icing does not come out. Prepare all your bags ahead of decorating.
Leveling and crumb frosting the cake
Rarely does a cake come out flat and even on top. Take a long knife and slice the top. If you have several layers place you filling and pile your layers up. Now, this is THE BEST ADVICE ever: place a thin layer of icing all over the cake and fill any gaps. Put it in the fridge until the icing is firm. No more crumbs messing up your icing job. It’s an extra step but really worth it!
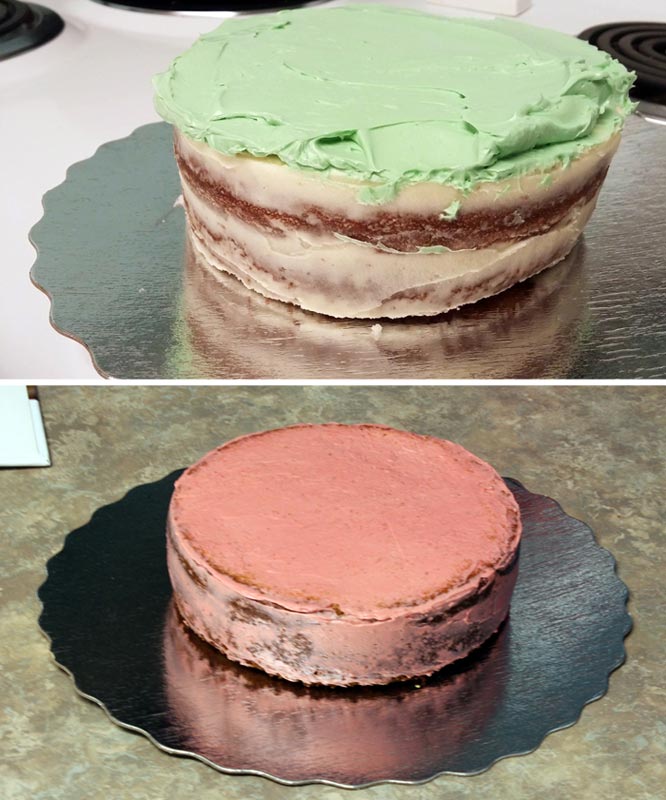
One last tip before I tell you about my two cake designs. Take a little bit of extra frosting and dab a few spots on your cake serving plate. Place cake on top. Once in the fridge, it will bond the cake to the plate and prevent the cake from slipping off.
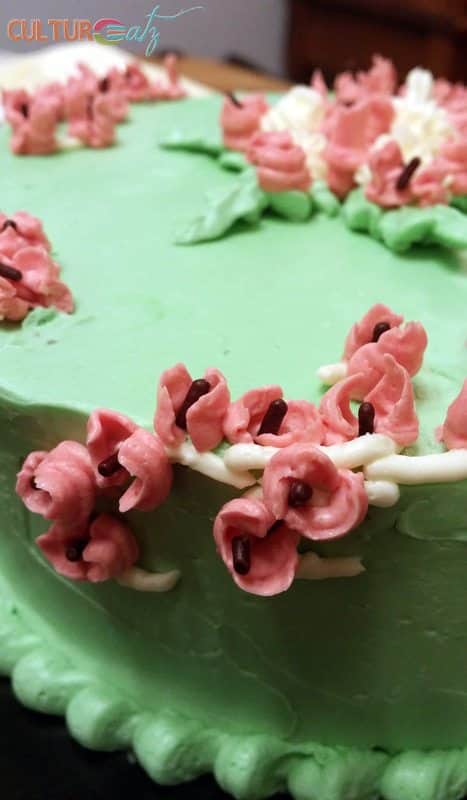
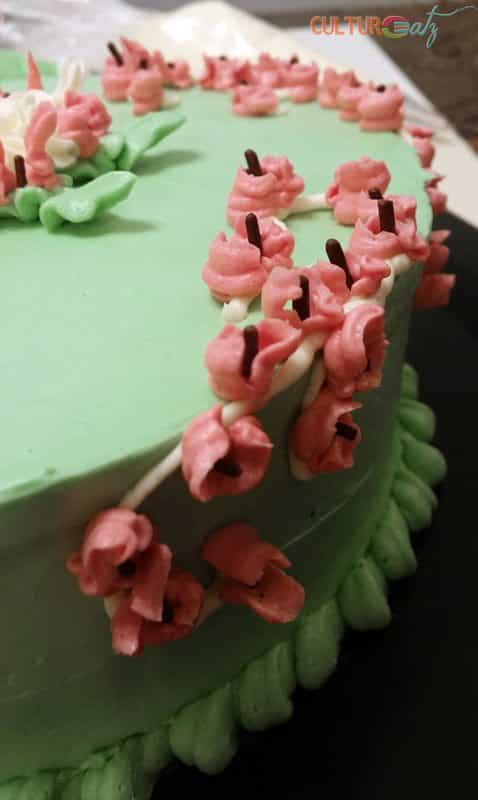
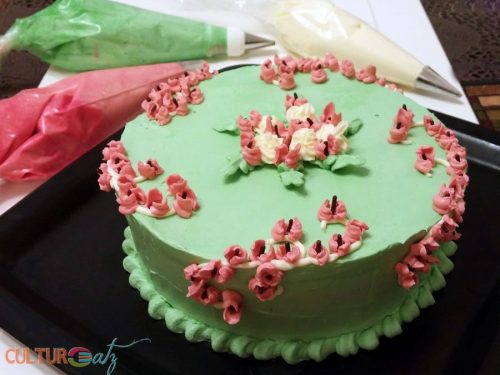
For my first cake, I chose a less intimidating project from the book (p239): a Lily of the Valley cake. See I put the wrong icing in my U tipped bag. I was supposed to use the white icing! Turns out there are rose-colored Lilies in real life…phew! I placed a chocolate cake sprinkle with a pair of tweezers inside each flower for a final realistic look. For my first try ever I am very happy with the final result.
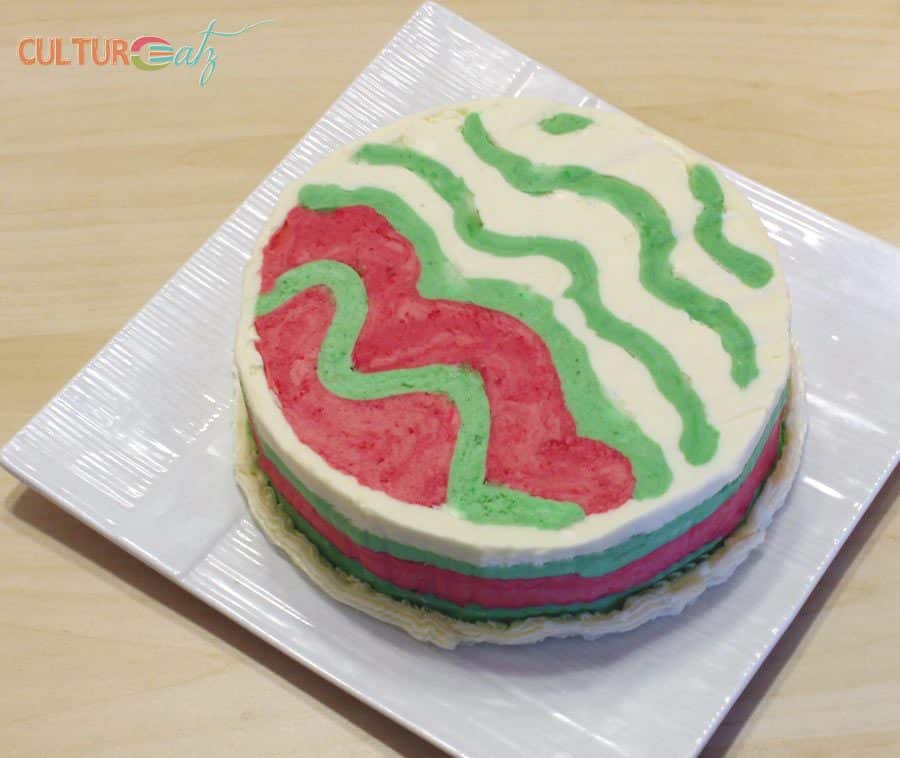
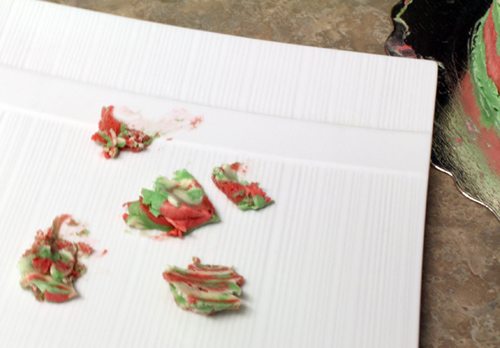
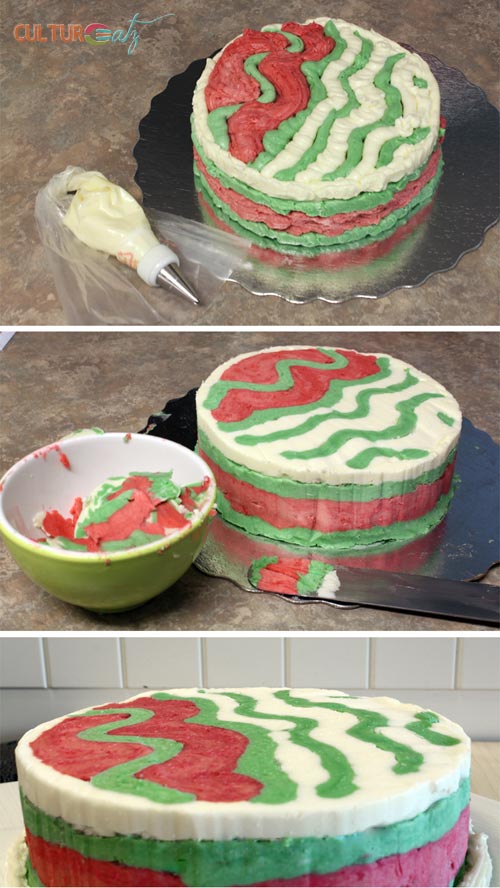
I had half the icing leftover so I got my pastry bags out of the freezer for Easter. This was just for fun and is very crude but what a fun technique. It is called the Reductive Scraping Icing Technique. Just pipe your design all over the cake as evenly as possible. I was going for an Easter Egg design. Once you have covered the whole cake place it in the fridge until well chilled (but not hard).
Click here to buy the Sensational Buttercream Decorating cookbook.
Take it out and while turning on a turntable slowly scrape away a layer at a time with a spatula until you get a uniformly flat surface. Do the same for the side. This technique requires practice, mine is far from perfect, but the look is so cool. Don’t worry, if your icing is chilled enough, the colors will not bleed into one another.
I have a long way to go before I am hired by a pastry shop as an icing expert, but I am really impressed with my first two cake decorating attempts. What do you think?
Are you a natural at cake decorating?
Is cake decorating a skill you would like to learn?
If you have a blog, how many years have you been blogging?
6-inch White Cake
Ingredients
- 1 cup + 2 tablespoons cake flour
- 2 teaspoons baking powder
- 1/4 teaspoon salt
- 1/4 cup butter room temperature
- 1/2 cup granulated sugar
- 1 egg
- 1 teaspoon vanilla extract
- 1/2 cup milk
- 1/2 batch of Swiss Meringue Buttercream
Instructions
- Preheat oven to 350.F. Grease a tall springform 6-inch round cake pan.
- In a bowl mix the flour, baking powder and salt together.
- In a mixing bowl cream together the butter & sugar until light and fluffy with a mixer, 3 to 5 min.
- Add the egg and vanilla and beat well, scraping down the sides on the bowl.
- Now add and beat between each step: 1/3 of the flour mixture, 1/2 the milk, 1/3 of the flour mixture, the remaining milk, and the remaining flour mixture. Scrape down the sides the bowl regularly.
- Pour the batter into the prepared pan, and shake it a bit to remove air bubbles. Bake for 30 to 40 minutes, or until a toothpick inserted in the center of the cake comes out clean. Cool for 10 minutes on wire rack before removing from the pan and cool completely before icing.
- Ice cake as desired with Swiss Meringue Buttercream
Want more awesome birthday cake ideas? Check out these recipes:


It is a really beautiful cake! If this is one of your weak points, I can’t imagine anything being really hard for you 😀 The colors are nice, the piping is nice and buttercream is nice… the only negative thing I have to say about this is that I wouldn’t have recognized the flowers as lilies-of-the-valley… tiny bells and big leaves… maybe that’s about cultural references, maybe there are other kinds of lilies-of-the-valley… but it is beautiful nevertheless.
I also like the other cake. Looks good, too. 🙂
Thank you so much Ketutar for your comment and compliments 🙂 Well it is my first try at lily of the valley, maybe not perfect but not to far off lol. But yes they are more bell shaped in real life.
Congratulations on your blogiversary, and thanks for the cake decorating tips — I need them!
Thank you Marlene and I hoe the tips do help, it’s all in the practice.
Congratulations and Happy Anniversary! Gorgeous cake by the way.
Thank you so much 🙂
Looks fantastic! I wish I have your skills! Happy Anniversary!
Thank you so much Vicky 🙂
Congratulations on blogging for 9 years!!!! Also, as someone who is certifiably awful at decorating cakes, I found this post to be super helpful. Thanks for all the tips 🙂
Thank you so much Mairead. And trust me I am bad too, I just applied carefully what the book said, you can do it too 🙂 Glad you liked the tips.
You are so talented!! I’m amazed at the delicacy of the blossoms. 🙂
Thank you Krista, the swiss meringue buttercream is a dream to work with.
Congrats Evelyne! 9 is a big milestone in the blogging world and something to be proud of.
And the cakes look beautiful – I would never have guessed you were a beginner at all!
Thanks for being part of our community and to 9 more happy years of blogging!
Thank you so much Melissa and FBC for the wonderful comment. And just as many years for FBC and more, great organization. See you at FBC2016!
Happy 9th!
It’s like raising a child and you’re about to get to the best years! 😛
Your cake decorating skills are on point! They remind me that I have a cake that I need to make tonight, but really don’t feel like doing! 🙁
Love your blog!
Thank you Krysten for the lovely coment, wow I never thought of it like raisig a child before lol. Oh I am sending you that little push to make your cake tonight, it will be delicious.
You have done an amazing result. I love how the flowers turned out, and the green icing is so precise!
Ah thank you Kristy, glad you like the cake deco, love the green too.
WAWHOOOO…. Happy blogaversary! What an achievement, 9 years is very impressive my friend, what I treat I have been able to be a part of it this past 6-12 months. Loving your cake too, you’ve got skills!
Thank you so much Anna and I am glad we found each other’s blogs too recently,you are so inspiring. Thanks for the cake comment 🙂
9 years!!!!! WAHOO! That is INSANE and AMAZING – just like how this cake LOOKS! You’re so friggin’ creative! 😛 You should make me something – HAHAHAHAHAHAH! Okay, selfish GiGi, STFU!
Thank Gigi and Hahahaha I will cake my cake I send you nice cake frosting during shipping…but that will the the theme.
You did a fabulous job!!! I’m still working on just getting a decent swirl of buttercream on a cupcake! Baby steps for me! Happy #9!!!
Thank you Liz, trust me just one good effort and you can have the same results.
First of all… Happy anniversary!!! It’s such a huge milestone and came is the only way to go! I love the Colours you have used… Pastels are really pretty to the eye.
Thank you so much Rosemarie for the congrats and glad you liek to colors 🙂
Congratulations and OMG! You outdo yourself every time! They both look absolutely amazing. I LOVE your attitude (‘even Masters started with a humbling first cake’)! 9 years..WOW. I have known you for 3 and I can’t remember a single time when I haven’t left this space feeling inspired. So well done and looking forward to heaps more.
Aw thank you so much, maybe one day I’ll decorate cakes at your level. Which will be hard as I do not make many cakes lol. But thank you so much for your touching comment. I am as inspired because I am surrounded by wonderful blogger friends.
Happy blog birthday!! and wow what a cake, love all the tips you shared!
Thank you so much Joan
Congratulations, Evelyne! 9 years is a wonderful achievement, and a LONG time to have been blogging. You continue to impress and inspire me 🙂
Oh, and great cake decorating, by the way!
Thank you so much Viviane, that means a lot and you are also always inspiring!
First congratulations on the 9th blog anniversary! The cakes look awesome…you did an amazing job decorating them…I can only imagine how delicious they must be.
Hope you are having a wonderful week Evelyne 🙂
Thank you so much Juliana! they were very good hihi. Hope you are having a great weekend!
I think they’re amazing, I certainly wouldn’t be able to do anything like that!
Thank you so much!
Excellent, Evelyne! The cakes look delicious! My MIL always baked and decorated cakes for weddings, etc. It takes a creative person to do it and you have! Happy Blog Anniversary to you!
Thank you so much Pam! Oh bet MIL made beautiful things.
Wow, 9 years?!!! Congrats! And you’re tackling cake decorating — one of my many weak spots. I’m definitely decorating challenged. You make it look easy! But then, you’ve had 9 years to build up to this. 🙂 Good post — thanks.
Thank you so much John, yep 9 years! Trust me if you put your mind to it and lots of patience, youca n cake decorate. This was my first real serious try 🙂
Happy blogaversary and well done on learning a new skill ?
Thank you so much Tandy!
Happy blog birthday!! I am VERY impressed with this cake – decorating like this still eludes me! Here’s to a DECADE next year!
Thank you so much Mardi, I am sure you would be amazing at cake decorating too! 🙂
Congratulations on 9 years!!!!! That’s a LONG time!! 🙂 You’ve done a great job and I sure have enjoyed following you. Love your recipe and your love for cooking and life. It’s contagious! Great cake decorating skills. Wish I liked cake. That would be a great challenge. Good for you! Looking forward to seeing what you dish up in year 10.
Thank you so much MJ for you comment, I truly cherish every post you wrote as well. We meet great people when blogging!
Happy Blog Anniversary! And your cakes are looking great! 🙂
Thank you so much Nagi 🙂
You did very well, Evelyne. Both cakes look beautiful.
Happy Blog Anniversary!
Thank you so much Angie.
Ohhh!
This cake looks absolutely amazing!
I can imagine how tasty it was!
🙂
-JarOfSweeets-
Thank you JarOfSweeets 🙂 It was pretty amazing tasting!