Wow, been a while since I posted by my standards! But it has been a whirlwind past few days. Alas I found out on Friday 2pm that I did not get picked to move on to round 4 of Project Food Blog. I am (more or less) over it, I was actually pretty shocked, saddened, and hurt a little. But it is a competition and that is part of the game. I did still beat out over 90% of the participants. Being top 10% is AWESOME.
This past weekend was the Canadian Thanks Giving so I give thanks. I made it that far because of YOU. So Thank YOU so much for everyone that voted and commented and cheered me on, whether a close personal friend and family (you guys I love you all) or my blogosphere wonderful friends and fans. BIG HUG!
And I support and will vote for my favorite remaining competitors until the very end. I hope this contest takes place next year too. I have learned so much. And since I was heading out of town until Tuesday morning I had prepared my 4th entry which was along the theme of creating a step-by-step, instructional photo tutorial. I actually was so torn between two recipes I did them both. So I am presenting you with the first of my would be contender recipes…sponge candy, also known as honeycomb toffee, sponge toffee or cinder toffee.
Sponge Candy by Christine Cushing
Ingredients
2 1/2 cups granulated sugar
2/3 cup light corn syrup
6 tablespoons water
2 teaspoons vanilla
2 tablespoons baking soda
Directions
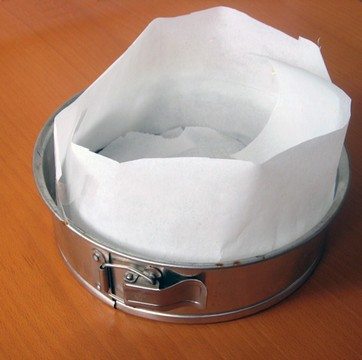
Liberally grease a 10-inch round spring form cake pan with vegetable oil. Line the bottom of the pan with parchment paper. Line the sides of the pan with a parchment paper so that the parchment paper creates a collar that sits 1 to 2-inches above the pan. Liberally grease the parchment paper.
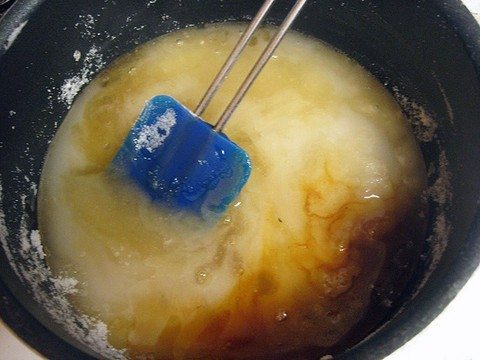
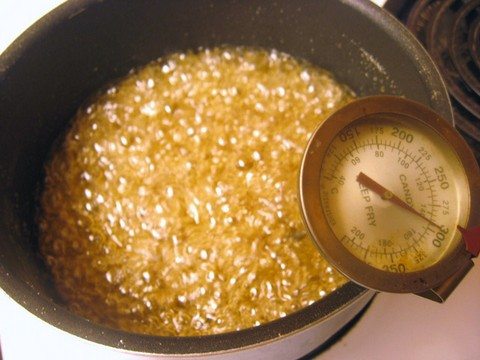
In a deep medium saucepan add sugar, corn syrup, water, and vanilla. Over medium-high heat bring the mixture to a boil (without stirring) and cook until hard crack stage, i.e. until temperature reads 300 degrees F. on a candy thermometer. This should take about 10 minutes. During the cooking process, if there are any sugar crystals on the sides of the pan, brush the sides of the pan with a clean pastry brush dipped in water.
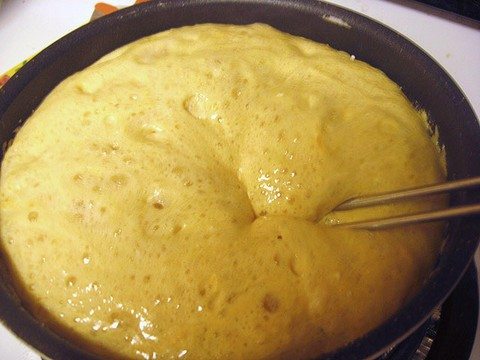
Remove the sugar mixture from the heat. Working quickly, add the baking soda and whisk to incorporate the soda into the sugar mixture, about 5 seconds. Note the mixture will bubble up when you add the baking soda so be very careful not to touch the hot toffee.
Immediately pour the hot toffee into the prepared pan. Seriously DO IT QUICK! I did not and had my photo shoot set up in the living room. Good to know: it peels right off ceramic tiles and carpet but needs a nudge on parquet floors. Bet you never thought you would learn that here today.
Let cool and set completely before touching.
Cheese !! ???
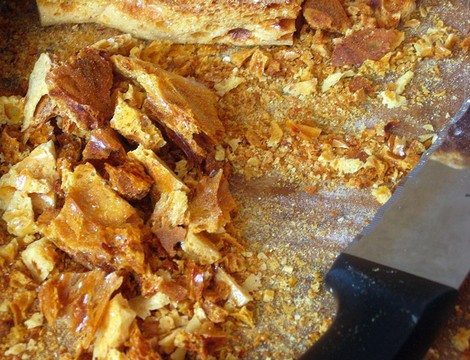
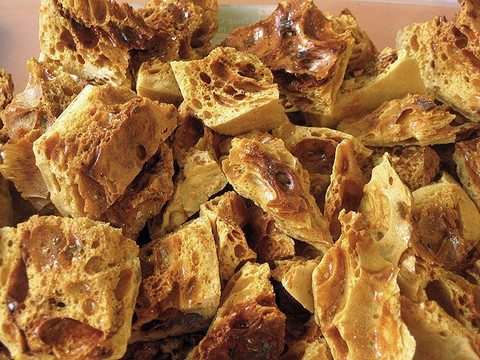
Break into pieces and serve as is or store at room temperature in an airtight container. Keep the ‘dust’ for dessert or ice cream toppings.
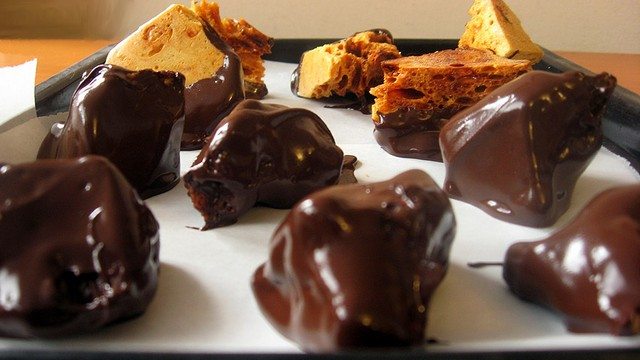
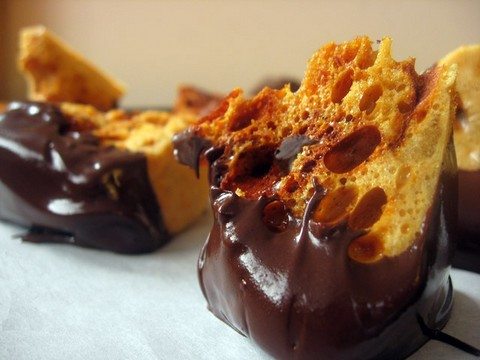
Better yet, how about a little chocolate dip? Just melt some chocolate slowly and dip all of or part of a piece of sponge candy. Let cool in the fridge.
I was surprised at how light and easy this sponge candy was to bite into. The store-bought stuff is hard and compact normally. But if you keep it airtight and away from humidity this one stay surprisingly light.



@Dana Candy all the way
@Sara of yes condensed milk would be too much…its already almost all sugar lol.
That is one of the greatest things I have ever seen! What do you think about replacing the water with sweetened condensed milk? Too much?
That is really really cool. I can’t wait to try this.
I’ve never heard of this before, but it sounds tasty!! Is it crunchy like a cookie, or crunchy like candy??
Wow! I am making this TONIGHT! And I’ll get some orange dark chocolate to dip it in 😀
Big hugs back, Evelyne! You did so well to get as far as you did, well done! 😀 Also, big props for actually entering in the first place, and for doing such great posts for the challenges.
The uncut sponge looks like a crazypants panettone! Dipping it in chocolate completes the deliciosness perfectly and I would eat it until my teeth hurt.
There’s only one reason I’ve stayed away from ever making this…I’d be afraid of losing control!!! Along with cotton candy…this fabulous treat you made is my favourite other sin. You wouldn’t by any chance kept a chunk or two to bring to our get together? ;o))
About the contest…I’m terribly disappointed for you as well as some other talented Foodies that didn’t make it through because of lack of mega followers. Judging by some entries that made it to the 4th round…I’m not all that impressed with how a star blogger will be chosen! Oh well, just my 2 cents on the matter.
You’re spades in my book Evelyne ;o)
Ciao,
Claudia
Thank you Claudia, Jouama and Conor for your words of encouragement. Secretly yes I agree with your Claudia in your final comment..shhh
Claudia…yes I will keep you some for our meeting next week 😉
Haha Anne-marie you brought some at work lol. Cool
This is one of those treats from childhood days that I thought I would never ever make, that it was reserved for the industry and sophisticated machinery. I am glad to see this is not the case and your instructions are very user-friendly. Sorry you did not make it further up but like you say, it was a learning experience and worth it to you.
I am sure next year you will go up to the top, or near top.
I had some!! Without the chocolate. It was Yummy. Like you mentioned very light, and not hard at all like the store bought stuff… I brought some @ work and they loved it and keep asking for more! You are perfectly right,You are AWESOME to have made it in the fist 10%! 😉
So light and scrumptious! I would love a taste of this for sure!
@Eileen…hey does not mean we are not good, as I said we remain excellent too!
@Mary and Anna…you GO GIRLS, I am cheering for you two and wish I could help with the video for you. And yes you have to made sponge sugar once in your life lol.
OMG! I have never seen this before. it looks amazing and must taste divine. A quick note to food o’ del mundo I’m totally freaking out about the video thingy too. Only think about it makes my eyes twitch. lol I’m so shy that hurts, it took 2 years for me to actually put a picture of myself on my site. And now they want a video???? Now back to Evelyne giiiiirl that chocolate sponge is making me drool. lol.
I’ve always wondered how this stuff was made. I don’t see it very often, which is probably a good thing, but when I do LOOK OUT! and now that I know how to make it..uh.oh.
I’m saddened you didn’t advance, I think my time will be up shortly too, at least I hope it expires before the video entry.
~Mary
Very interesting post. I’ve never seen this made before. I’d love to try it. Don’t feel bad, I got knocked out of round 4 too.
Ok, now, I’m drooling 😀
@Gege…remind me tomorrow and I will bring some for our cocktail meeting.
@Mary…Yes it was tall, my springform was an 8in so it when way wayyyyyy high lol.
Yumyumyum! This was always one of my favourite childhood treats from the grocery store. And then you made a Crunchie bar! I love the photo in the springform pan–definitely the tallest sponge toffee I’ve ever seen! Too bad about the contest:(