Already another cheese. I am on a roll! When I joined Cheesepalooza I was cutting it close to the new monthly deadline plus I wanted to make the challenge on the prior month…so you are getting 2 cheeses in one week. Have you ever wanted to make cheese but are not sure where to begin? This group is for you.
My first cheese was a basic goat cheese. That was a relatively simple process. Now for Feta, in theory it is still simple but you have to follow the recipe to the letter. Feta involves heating, curdling, draining, drying and ripening in brine. This challenge pushed me a little bit farther and gave me confidence for the next cheese. Check out the goat cheese round-up here.
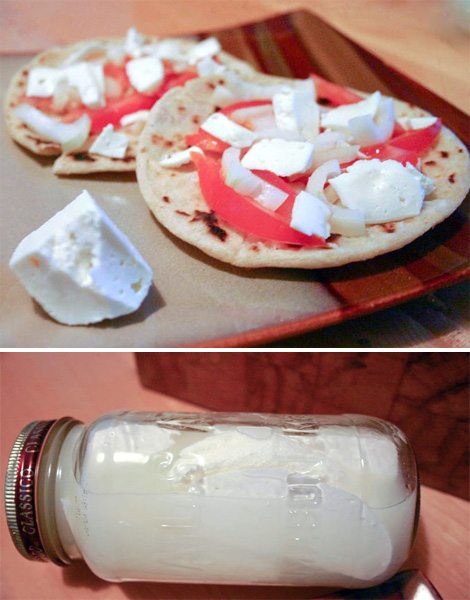
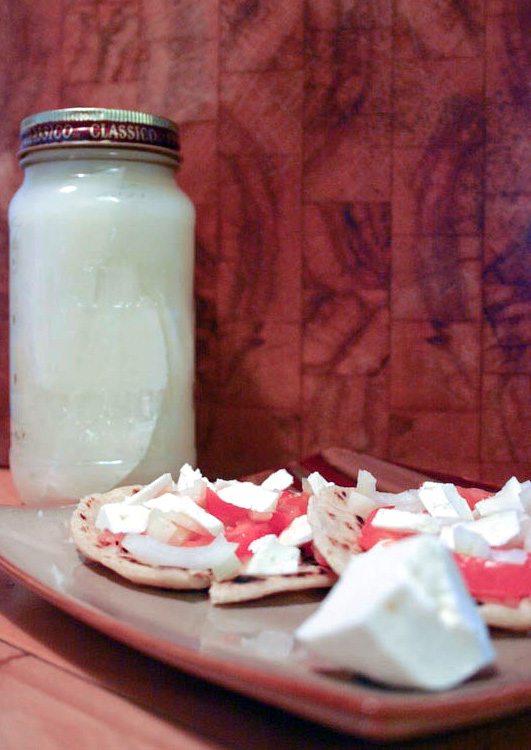
I have to say making my Feta was very rewarding. Now it will not be completely ready as I just put it in brine and it must stay there 1 to 4 weeks, but I had a piece already to top off a corn tortilla with a tomato and onions. It was soft, flavorful and just delicious.
To make your Feta you will have to get a few special cheese making supplies. Don’t worry it is a small investment only, but you will need to buy some lipase powder, calcium chloride and rennet. Lipase is a flavor agent for Italian and Greek cheeses. Calcium Chloride restores the calcium balance in the milk that was modified during pasteurization. Finally Rennet is a coagulant that firms up your milk protein. The 3 supplies were about 20$ and I have enough to make pounds and pounds more cheese.
I found my recipe online. For some reason just one recipe was not clear enough so I read many and settled on 2 that I combined: I used this recipe and this recipe. On my first try I failed: my cheese curd separated and it turned out rubbery. That is when I realized having a proper thermometer is essential. On my first try I raised the temperature to a level that killed my good cultures. I will repeat myself from my goat post: if you really want to start making cheese it is imperative that you buy a digital thermometer. I found one at my grocery store for 15$ and it goes from -40 to 450 degrees F (-40 to 230 degrees C). Now let’s cut the curd…
Ξ Feta Cheese Ξ
1 gallon whole milk, preferably goat or a mix
3/4 cup cultured buttermilk
1/4 tsp lipase powder
1/2 tsp calcium chloride
1/4 tsp liquid rennet
1/4 cup + 1/2 oz of non-iodized salt
Begin by warming the milk in a saucepan to 86° F. Add the buttermilk and stir well with a slotted spoon or skimmer. Cover the pan, and let the mixture rest for about an hour. Maintain the temperature at 86° F (keep burner on low to med-low and check often).
At 40 min, add lipase to 1/4 cup of cold water and mix. After the hour, add lipase while stirring for 30 seconds and then add the calcium chloride stirring for 30 seconds. Add the liquid rennet and stir gently, but thoroughly, for 1 minute. Cover again, and let the mixture sit, undisturbed for an hour, while always maintaining the temperature at 86° F.
At the end of this time, the rennet will have caused the milk to congeal into a gelatin-like texture. Using a knife that will reach to the bottom of the pan, slice the curds into 1/2″ cubes in a crosshatch pattern. While you still maintain the temperature at 86° F, let the curds rest for 5-10 minutes. You should notice the almost-clear, liquid whey seeping out from the cuts. Then stir gently for about 15 minutes to break up the curd.
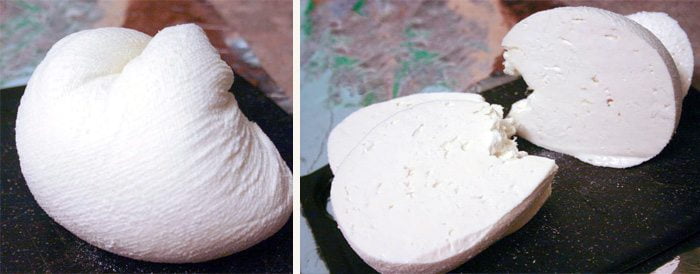
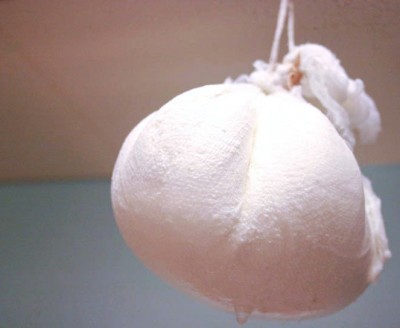
Pour the curds into a colander lined with 2 layers of cheesecloth and drain for 30 minutes. Reserve 1 quart of the whey in a container and refrigerate. Gather the corners of the cheesecloth, and hang over a bowl or the sink to drain at room temperature for about 24 hours.
Cut the feta into 2- to 3-inch pieces. Arrange the squares in a single layer in a shallow container with a tight-fitting lid. Sprinkle about 1/2 oz. salt over all sides of the cheese. Cover and let sit at room temperature for 4 days. Each day, pour off the whey as it collects in the bottom of the container.
Transfer the cheese pieces to the 3 quart glass container—it’s fine to stack them at this point. Heat slowly 1 cup of your whey to almost boiling. Stir in 1/4cup salt, 1 tsp vinegar and 1/4 tsp of Calcium Chloride. Once the salt is dissolved mix in remaining brine. Pour this brine over the cheese, covering it completely. Cover and refrigerate for 1 to 4 weeks. The longer the feta is aged, the stronger the flavor and crumblier the texture will be.
If you want to learn more about cheese making check out my past posts on





hi evelyn, i’m totally amazed with your tuturial..
great picture instead,
btw can i make this feta from my powder goat cheese???
since i can’t access any fresh goat milk.
Love your post. I didn’t realize that the aging in brine will contribute to the crumbliness and change in texture. Interesting to know.
Curious to hear how it is when ready to eat. Love the three picks of your curd cutting! Great read. I learn more with each person’s post I read. AMAZING! We are so happy you have joined us! Enthusiasm abounds – and if you haven’t tried ricotta now, you must. I will add it to the round up – no matter when. Why did you choose not to use Mary’s recipe? Just curious. And the link to the chevre round up just goes to my site. 🙂
Let’s Make Cheese! Wish we were closer!
🙂
V
Really great post. I look for multiple recipes for cheeses and “cherry pick” parts that seem clearer. It is nice to know I am not alone
Well it sure looks good! I keep meaning to post about making cheese at home as well but I get so caught up. Thanks for inspiring me to get on it!
I so love feta… I think being able to make it myself would be dangerous LOL
Very impressive… Looks great!
It looks good, reminds me of mozzarella. Don’t suppose you could try making that as well?
I love homemade cheese! I usually make queso fresco or Colombian fresh cheese and it is delicious, but this looks so good…I want try it so bad!
Beautiful job on these cheeses. My friends and I had a cheese making party several months ago. Suffice it to say, we weren’t nearly as successful making our mozzarella as you’ve been here. We made the mistake of using nonfat milk. Not a good idea – the cheese came out hard and blue!
I’m totally impressed by your homemade feta cheese Evelyne!!! It’s on my to do list to make cheese and tofu! Once you made homemade version, I bet it’s hard to go back to store bought – it looks SO good!!
YOur feta looks wonderful! I’ve always wanted to make firmer cheeses-so far I’ve just made ricotta and mascarpone 🙂
Wow how impressive you made feta all by yourself? I always think other cheeses, mozzarella, but feta never crossed my mind, although it is much used in this house especially over olive bread and with a slice of tomato on top!
Wow, you made feta!!!! I am so impressed…what a treat!
Yes 3 cookies, in June blue cheese!
Looks delicious Evelyne!
so cool! i definitely want to start making cheese 🙂 if only there were enough hours in the day…
This one looks a lot more complex than the last one. Looking forward to ‘blue cheese’!?
You’re making me want to devote an entire day to cheese making..I can only begin to imagine what I’d do with all of it…=)
Best problem ever, eh?
wow, Evelyne, you continue to amaze me with your cheese making skill.
I have a small bottle of rennet forgotten in the fridge. Need to make my own cheese too!
I’m getting more and more excited to join this group, Evelyn! Your step by step is amazing! So is your final cheese. Congratulations, what a great job!